
 |
| My Sketch Books...drawing out new designs |
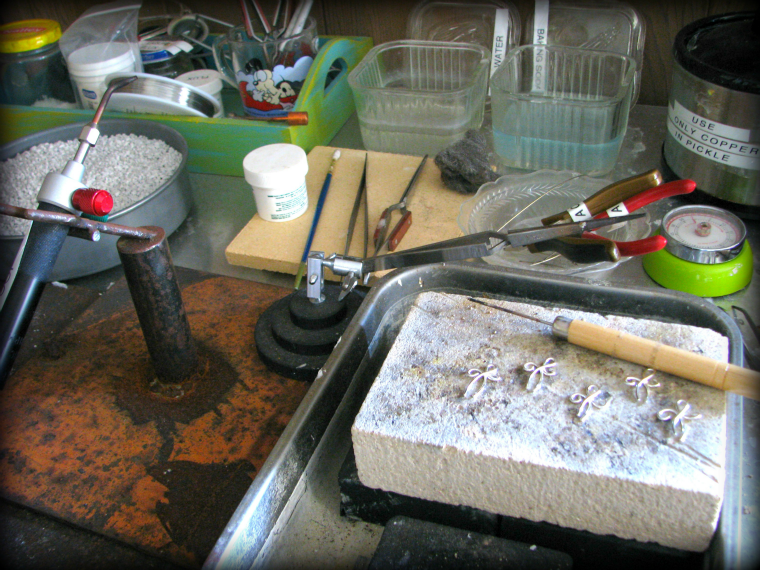 | ||
| My Silver Smithing Station...where some of the Magic happens |
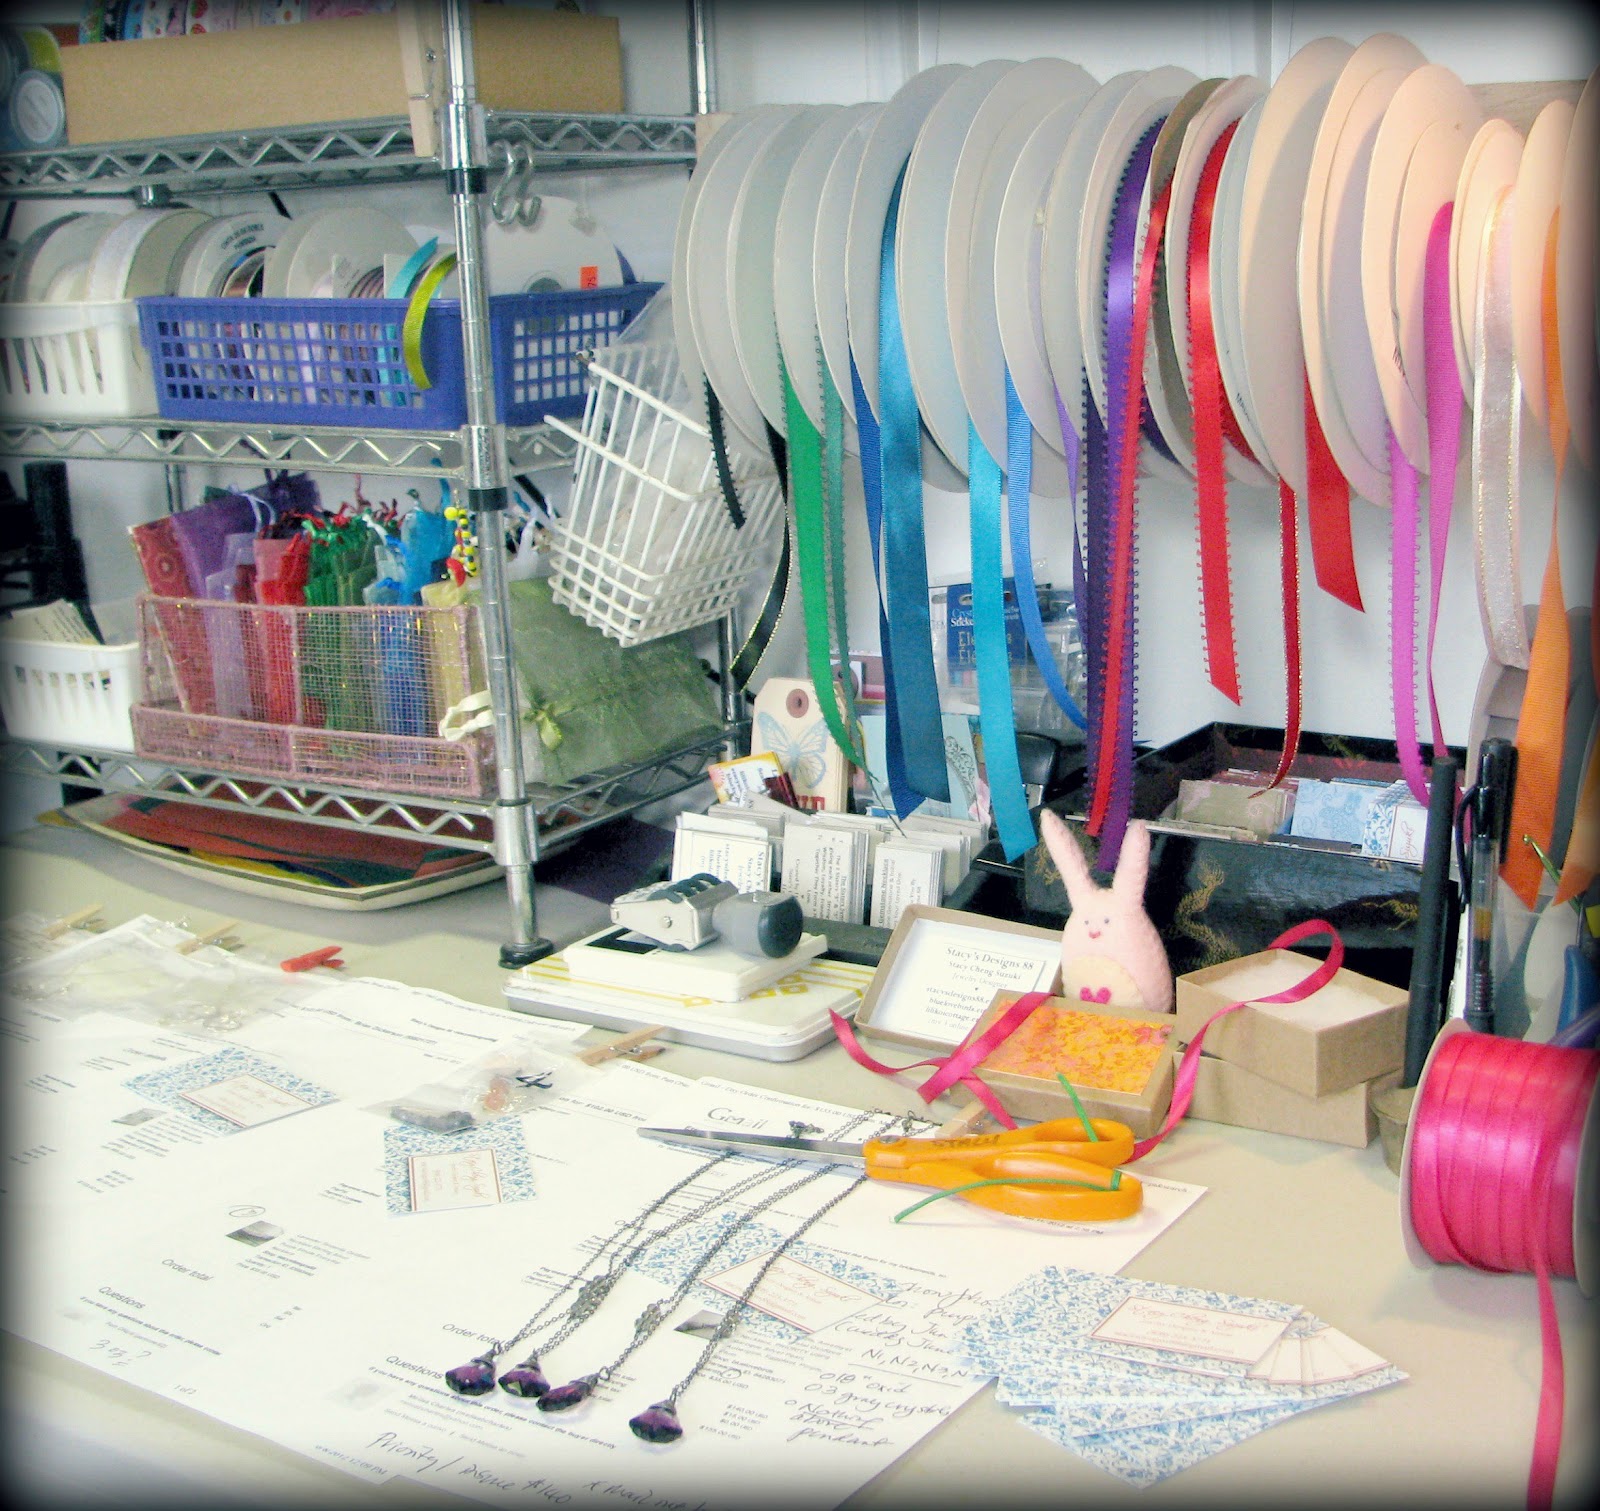 |
| My Packaging Table where Color abounds |
Etsy has a new feature called "About". It allows Etsy Artisan Shop Owners to tell their story with words and photos. So, I used this as an opportunity to take some much needed photos of some of my process.
For all you Etsy shop owners, here's a helpful write up and video by Etsy... click HERE.
Watch the video bc it's very helpful and shows you where to go in your shop to start creating your "About" page. I'm not going to discuss the basics on set-up bc they go thru that on the video.
To help you understand what I'm talking about below a lot better, I suggest you check out my "About" page first. To see my Etsy Shop Stacy's Designs 88's "About" page...click HERE.
My Helpful Hints and Tips for Etsy Shop Owners creating their "About" Page...stuff that's not on the video:
Shop Member Photos:
Etsy wants You to show the "human side" of your shop. So, they want you to use your photo...to show your face behind your shop.
It's here that you can reveal the other folks who help with your shop.
For my photo, I used a photo I've used before which I like. Bottom line is that you should put your Best Face forward. So choose a photo or take a photo of yourself that you Like.
Also, I uploaded a photo of my husband Jimmy..another shop member...as he creates jewelry which I put in my shop and lends a hand when I get tons of orders.
Important Tip:
While you're in Edit, you can move the order placement of your Staff photos by simply "grabbing" the photo and moving it to the position you want. This is the same thing you do while your Listing an item when you want to move around the photos.
The Owner's photo should be to the Extreme Left. Then, it'll show up as the Largest Photo on your page. Your Staffers photos will be under yours and slightly smaller. The Staffer's title will not show up on the page. You can see it when you move your cursor over their photo.
The Story Section:
This is your spot to say what you want. Obviously, put your "marketing" hat on when you do this. What do you want folks to know about you? What will grab there attention? What will get them to "see" who you are? What's your story? Why are u different from the 1000s of other Etsy shops out there. What inspires you? What makes you do what you do? How is it that you do what you do?
One of the marketing reasons for telling your story is if customers get to know you and like you, then you've added that much more value to what it is your selling with a higher chance of them buying from you. The flip side is that not everyone's story is going to tug that right chord in every potential customer. Just do your best and speak from your heart.
For my Story section, it's still a work in progress. I keep going back and fuss with it. Changing a word here, taking out words there. It's getting there. It has a serious tone to it and I'd like to kinda give it a more light hearted tone but it needs work to get there.
Choice of Photos:
You get to upload 5 photos of you, your process, and whatever else you want to convey thru pictures. So choose wisely.
I knew I wanted to show them my sketch books with drawings that wasn't giving away "secrets", my work station where I solder jewelry, my packaging bc my clients really love my gift wrapping.
Later, for my 4th photo, I decided that I wanted to show a custom job and contacted my client and asked her permission to use her grandmother's photo which she had sent me previously. She readily agreed. I created a collage using PicMonkey (which replaces Picnik..now defunct) using photos taken of her custom order.
For my 5th photo, I still have to do it. I'm leaning towards showing my gemstones and sterling silver components so my potential clients get a sense of the quality and breadth of components that I have available to use for their jewelry. And colorful gemstones always makes a gal's mouth water right?
5 Cropped Photos:
Note that when you upload your photos, it will auto crop it. What I've discovered from much trial and error is that they keep the Top 2/3rds of your photo and crop off the bottom. So, when you're taking photos, make sure that all the good stuff is at the top 2/3rds of your screen and leave the bottom 1/3rd bare or with stuff you don't want in your photo anyway.
While I was editing my photos for this section, I saved it at 760 bc Etsy says that it'll display your auto cropped photos at 760px by 428px.
Rotating 5 Photos:
These 5 photos will automatically rotate thru.While you're in Edit, you can move the order placement of your photos by simply "grabbing" the photo and moving it to the position you want. This is the same thing you do while your Listing an item when you want to move around the photos.
Saving:
Remember to "Save" your work. The "Save" button is located at the bottom of the page. Everytime I made an edit or change, I would press the Save button and then check out what it looked like on my actual "About" page.
Two Tabs Open to Speed Up Editing and Review:
While editing, I always have 2 tabs open to speed up the process of editing and review. One in the Edit mode and the other in the "About" page. Note: you need to have made your "About" page live or "published" and open to the public to do this.
So, everytime I make a change or edit and then press "Save", I then go to my 2nd tab to my live "About" page and press the "refresh" or "reload" page button so I can see what my latest edits look like on my page.
TRY IT OUT:
I feel that the "About" page is a really great idea. It's going in the direction as Facebook. Personalize Personalize Personalize. In this internet world, folks still want to and are dying to "connect" with each other thru their computer screen or Ipads or Nooks or Kindles or cell phones. If they know a little bit about what makes you tick, then there's a connection.
Remember, on your "About" page, it's easy to Edit. easy to change things. it's not do or die. Put something up. give it a try. if you don't like it, then edit until you get it just right. but you gotta start with one photo, one word, one sentence. the rest will be easier.
NOTE:
I'm going to end here. But, I may come back and Add to this post after I've fussed around with my page more. So check back.
2 comments:
Wow, this is a great feature Stacy. I haven't heard of it, and it doesn't seem to be available in my shop yet.
Nice job!
Kym, thanks! I just put a link in the blog post for a How To by Etsy to create your "About" page. Super EZ and I believe everyone can make one now.
Post a Comment